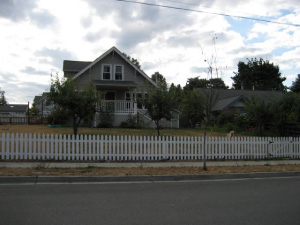
Picket Fence
|
Start Date
|
03/19/06
|
|
Finish Date
|
Work in Progress
|
|
Cost
|
Approx. $200
|
|
Time Required
|
30 Hours
|
|
Project Complexity
|

|
|
|
|
|
|
|
|
Project Statistics Guide
|
|
|
Tools List
- Post Digger
- Steel Rod (for digging post holes)
- 2-Man Post Digger with 8" auger (picture)
- Chop Saw with 10" blade
- Measuring Tape
- Wooden Stakes
- Hammer
- Scrap Wood (for bracing posts)
- Levels
- 2-Axis Post Level
- Power Screw Driver
- Concrete Mixer
- Mason Line
- Work Gloves
- Safety Glasses
- Respirator
- Pencil
|
Parts List
- 4"x4"x10' pressure treated posts (12 @ $14.95/piece)
- 60 lbs concrete bags (24 @ 2.99/bag)
- 2-Man Post Digger with 8" auger rental (1 day @ $60/day)
- 3" Outdoor Screws
- Pressure treatment sealant
|
Setting Up
-
We first drew out a sketch of the perimeter of the fence in order to get an idea of how many posts we would need.
-
We then walked around the yard and placed stakes at the corners where the fence would have to make a turn.
-
We then ran a mason line from each of the corner stakes so that it made a straight line.
-
Next we measured where the posts in between the corners would go and placed stakes in their location. We tried
to place them 8' apart on center as shown below in Figure 1.
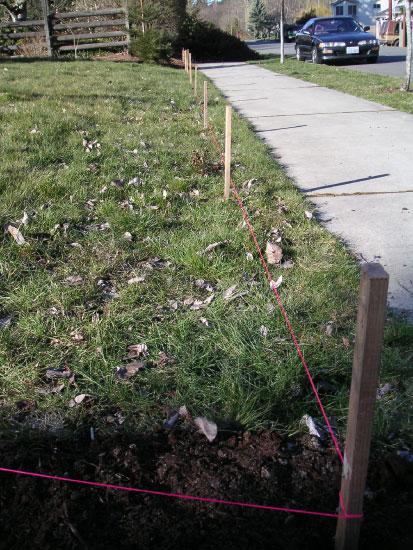
Figure 1: Stakes and mason line on perimeter of fence. Stakes show locations of posts.
-
At this point, we were ready to dig. A small note, we placed the stakes where we thought the center of the post should go,
but in the future, a better method would be to offset the mason line by a fixed number (like 2") from where the actual post
will go. This will make sure that none of the stakes touch the mason line and make it crooked.
|
Digging Holes
-
We then used the 2-Man Post Digger to dig 2' deep holes. There are several auger sizes that you can get, its a good thing
we got the 8" diameter auger instead of the 6" diameter auger because it makes a slightly bigger hole so we have more room
for error.
We found that the post digger's effectiveness varied depending on how many rocks we encountered during the digging process.
We encountered all sized or rocks as shown below in Figure 2.
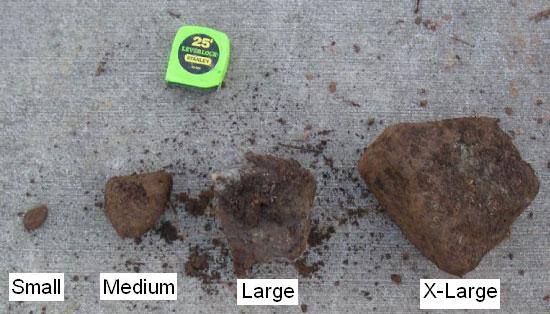
Figure 2: Small, medium, large, and extra large rocks encountered during hole digging.
The post digger was stopped by anything bigger than a small rock. We quickly learned that instead of fighting it, was soon as
we felt the digger hit a rock, we needed to stop and dig out the rock by hand. The most effective method for freeing rocks in
shown below in Figure 3. This involves digging out the dirt above the rock using the steel rod and then using the rod to lever
the rock into the hole.
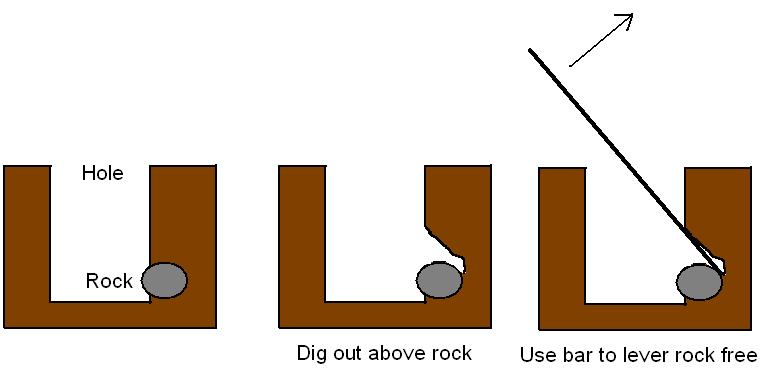
Figure 3: How to free rocks using the steel rod.
-
After digging the 18 holes using the 2-man post digger, we dug out 5 of them by hand because they were in locations where
we were worried that we might hit a water or power line. To do this, we used the steel rod to loosen the dirt and the post
digger to remove the loose dirt.
-
We then placed posts in each hole so no one would step into the holes. The project at this point appeared as shown below in Figure 4.
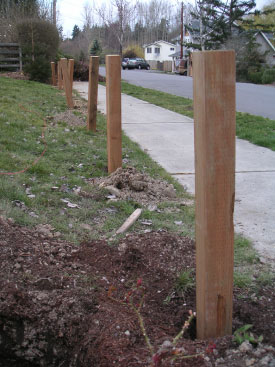
(a): Along front of house
|
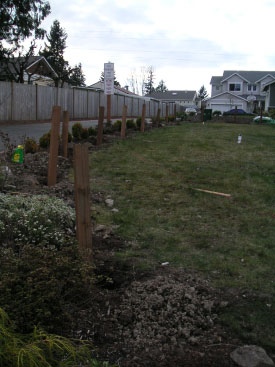
(b) Along side of house
|
|
Figure 4: Unset posts in newly dug holes.
|
|
Setting Posts
-
We are now ready to set the posts in their holes. The first thing we did was to place a large rock at
the bottom of each hole for the post to rest on and then we filled in the rest of the hole with about 4"
of gravel.
- The important thing is to ensure that the posts are straight and in a line. To do this, we first did a
feasibility study to make sure that the holes were positioned so that it would be possible to create a
straight line of posts.
To do this, we lined up a laser along one one so that one end of the laser hit the last post in the line
in its center and the other end of the laser passed over the center of the nearest hole (Figure 5a). We
then moved up the line by one post and made sure that it was possible to place this post vertical and have
the laser hit the center. We continued moving towards the laser (widening any holes as necessary) until we
reached the nearest post. This procedure is shown below in Figure 5.
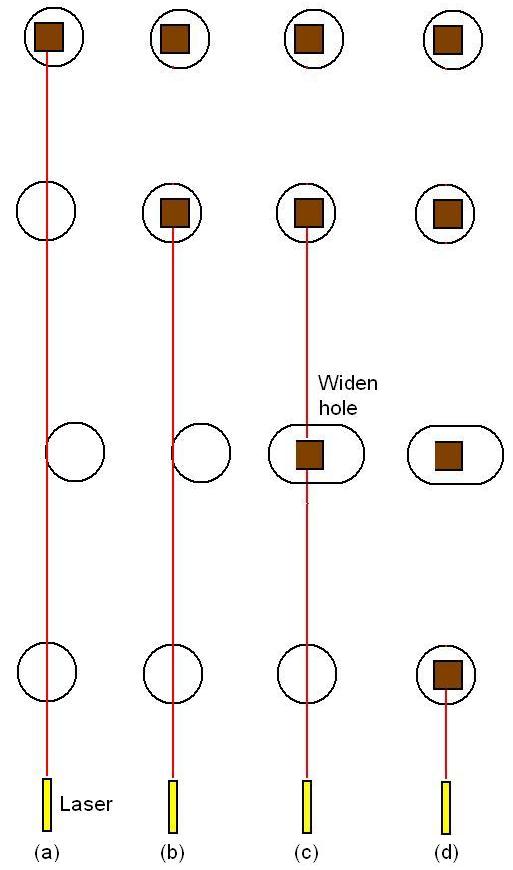
Figure 5: Procedure to verify that posts can be placed vertically and in a straight line.
-
Once we knew that the posts could be placed in a line, we braced the first and the last post vertically
using two braces. The easiest way to do this was to use a single screw to attach each brace to the post.
This way the brace can pivot. Then one person holds the post vertically while the other uses a hammer to
set the brace in the soil. We made sure that the two were orientated correctly and not rotated about the
vertical axis (see
this article, Figure 2).
-
We then poured approximately two 60lbs bags of concrete per post hole and rechecked that each post was vertical.
We also made sure to shape the tops of the concrete into a hill so that water runs away from the post
(see
this article, Figure 4).
-
We then strung a mason line off the outside face of each post. This would be the line that we would use to
make sure that the rest of the posts were in line and in plane with the two end posts.
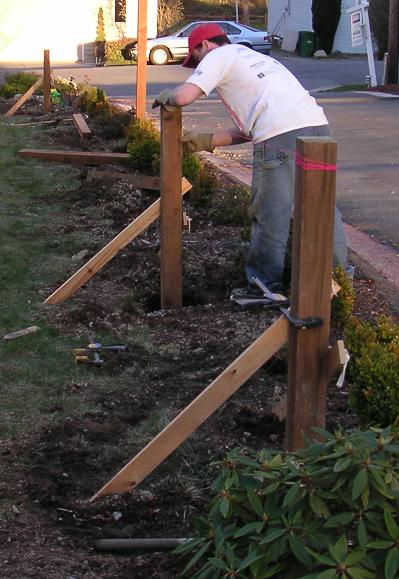
Figure 6: Showing bracing for posts and mason line (pink) between first and last post
-
We then braced and set the rest of the posts up against the mason line (making sure not to touch the line).
-
We let the concrete set for 24 hours before removing the bracing. All of the set posts are shown below in Figure 7.
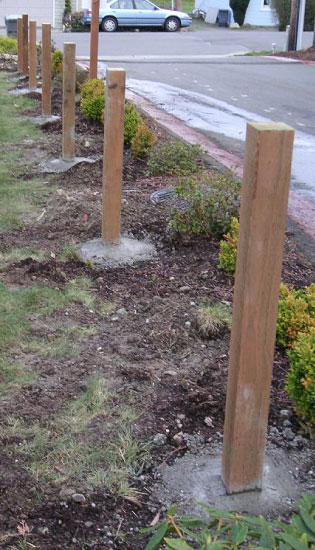
Figure 7: Posts set with concrete with bracing removed.
|
Attaching Rails
-
We were then ready to attach the rails to the posts. The first thing that we did was cut the posts to the
correct height. To ensure that the posts appear straight when you look down the fence, we measured a distance
x above the ground on the first and last post in a line. We then strung a mason line between the first and the last
post and marked where it touched the post with a pencil. This means that the tops of the posts will actual be cut
at and angle. This is good because it allows water to run off the tops. This is shown below in fgiure 8.
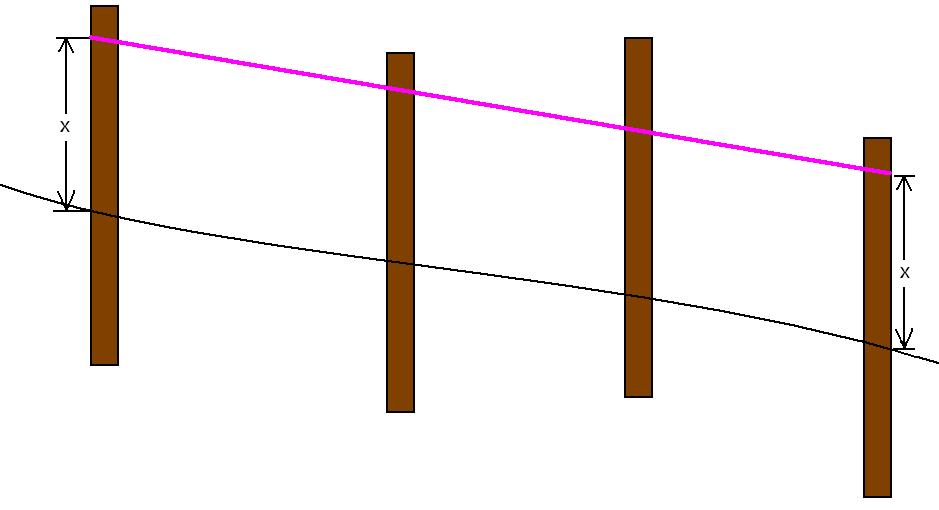
Figure 8: Pink mason line showing how tops of posts will be cut
(enlarge).
-
We then cut the posts at the line using a circular saw. The problem is that the circular saw is unable to
cut through the whole 4x4 in one pass. This required cutting it once from one side and then cutting again from
the other side. This was slightly undesireable because it is extremely hard to make the cuts match and you end
up with a slightly mismatched post top as shown below in Figure 9. This mismatch usually small and can easily
be sanded down using a belt sander or a dremel tool. Be sure to wear a respirator when cutting this since the
saw dust has the pressure treated chemicals in it.
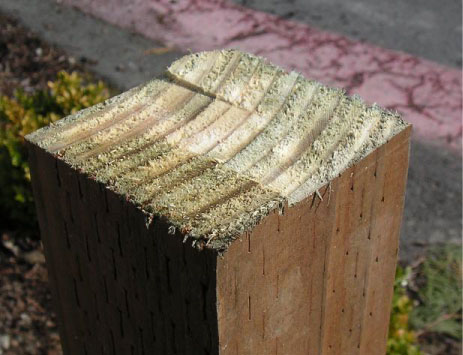
Figure 9: Post top showing slightly mismatched top due to taking two cuts with a circular saw.
-
Once the posts were all cut to the correct height, we sealed the freshly cut surface with outdoor sealant.
-
We were now ready to cut the rails. We placed a rail (a pressure treated 2x4) against the front
of the post and then marked where to cut it so that it would fit exactly between the two posts (making sure to take
into account the angle).
-
We then cut the rail and drilled pilot holes at the top and bottom at 45 degree angles. This is to reduce the chance
that we would split the rail when we put the screw through it.
-
We then screwed the rail to the post using 3" outdoor screws.
-
We repeated this for the bottom rail. At this point, the project looked as shown below in Figure 10.
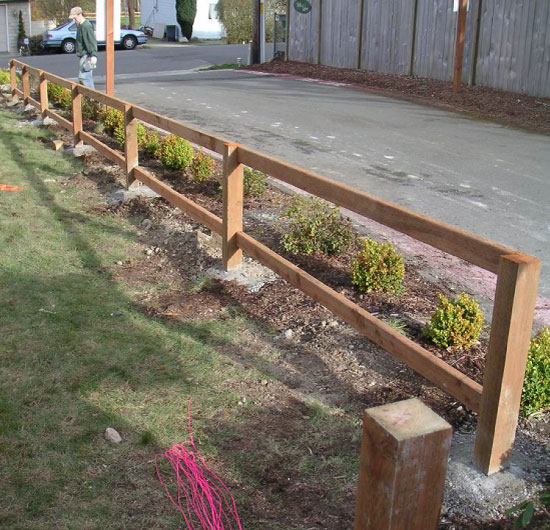
Figure 10: Post and rails.
|
|
|
