[an error occurred while processing this directive]

Uploading Files to Your Webpage

Sections
Introduction
Modifying Files on Local Machine
Connecting Via FTP
Uploading Files

Updated: 01/27/06
Download as .pdf


Introduction

In order to upload modified pages and documents to your website, you will need to do three things

  1. Modify the files on your local machine
  2. Connect to your site's server via FTP or SFTP
  3. Upload the files


Modifying Files on Local Machine

As a matter of good practice, it is suggested that you have an entire copy of your website on your local machine. This allows for easy changes and bookkeeping by having all your webpage files in one place. Our example website is shown below in Figure 1.


Figure 1: Website files on local machine

In this example, let's modify the file index.html. We'll modify it so that a picture shows up on the page.

  1. Find the picture that you would like to have displayed. In this example, we choose to display the picture named family_photo.jpg.


  2. Move this file somewhere in your webpage files on the local machine. In this example, we choose to simply put it in the same directory as index.html. The file structure is now shown below in Figure 2.


    Figure 2: family_photo.jpg added to webpage files on local machine


  3. Open up index.html using a text editor program (such as notepad or Crimson Editor).


  4. Modify index.html to reference the family_photo.jpg file


  5. Save all the changes you made. Now, all of your files on your local machine are updated and ready to upload to your website.


  6.  

    Connecting via FTP

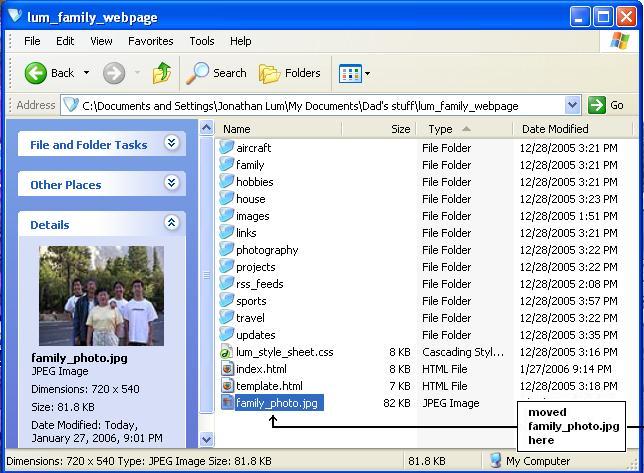
    Once you have all your files ready to upload on your local machine, you simply need to connect to your site using a File Transfer Protocol (FTP) or a Secure File Transfer Protocol (SFTP) program. We cover using simple FTP protocol to connect. The more secure SFTP protocol is very similar except you need to connect using a SFTP program.

    Some systems such as Comcast allow for a simply FTP connection to upload files to your site.

    1. Open a web browser window.


    2. In the address bar, type in ftp://servername where "servername" is replaced with the name of your server and hit enter. For example, if your server was upload.comcast.net, you would type ftp://upload.comcast.net. This is shown below in Figure 3.


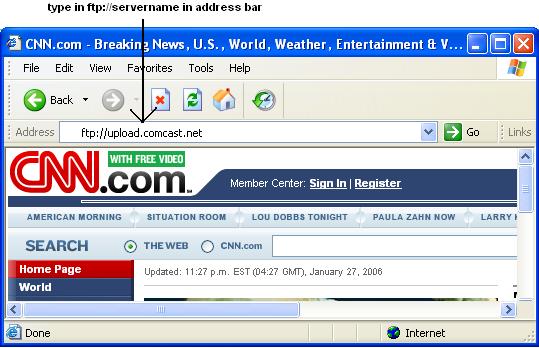
      Figure 3: type in ftp://servername in Web browser address bar

    3. Enter in your username and password.


    4. You should now see your space with all your web files as shown in Figure 4.


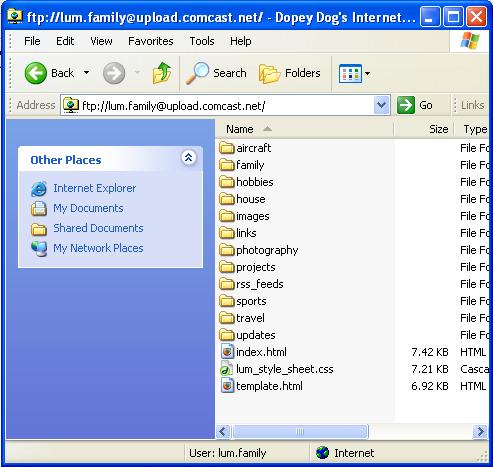
      Figure 4: Files located on your website's server.

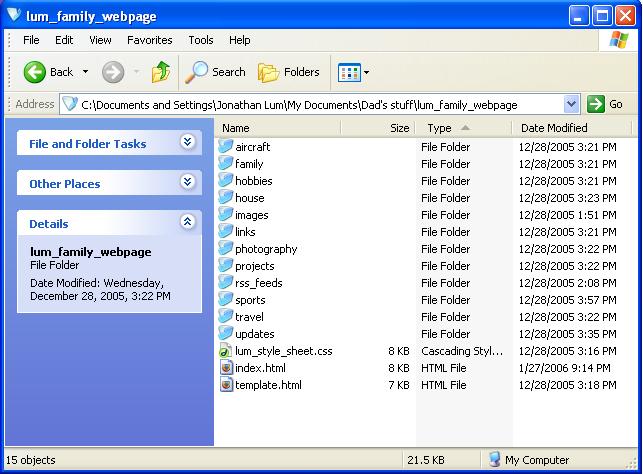
      Note that Figure 4 is very similar to Figure 2. It is important to recognize that the files displayed in Figure 2 reside on your local machine whereas the files in Figure 4 are located on your webpage's webserver. Our goal is to now synchronize both sets of files so the files on your web server are the same as the files on your local machine.


    Uploading Files

    1. Select the files that have been modified on your local machine. In this example they would be the files index.html and family_photo.jpg.


    2. Drag/drop or copy/paste these files into the FTP window (Figure 4).


    3. At this point, you may be asked if you would like to replace files. Since you are replacing the old ones with the new modified files, click on "yes".


    4. Your files are now uploaded to your website. Check your work by going to the webpage and verifing that the changes have taken effect (note that you may need to hit the "refresh" button on your browser to see the new changes).


Alison Lum Events
Calum Consulting
[an error occurred while processing this directive]