Kitfox Model IV Construction Timeline
This
is basically the rough timeline of construction. It also contains entries
from my Dad's logbook. Logbook excerpts will appear in quotes and italics.
| 4/10/93
- |
Trip
to Idaho to pick up Kitfox Fuselage Kit
"Started
at 12 noon head for Portland thru Columbia River Gorge to Idaho
to p/u the frame." |
| |
|
|
This is
truly the start of the project. My Dad decided to go down to
Idaho to pick up the first kit. This is the heading off on the
beginning of a 10 year adventure.
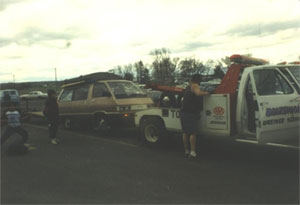
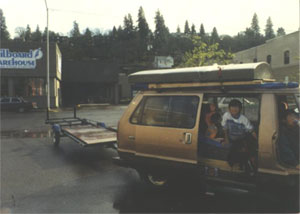
Here we
are with our old Toyota van packed and ready for the trip to
Skystar in Idaho to pick up the fuselage frame kit.
|
|
 |
| |
We towed
the trailer behind us to carry the fuselage frame. Since it
was going to be a several day trip, we also build a rooftop
camper that mounted to the top of the van.
|
| 4/11/93
- |
Car
water pump breaks en route to SkyStar
"Water
pump at van broke (shaft). Stuck at Exit #168 at Hwy 84." |
| |
|
|
|
|
Unfortunately,
one day into our trip, the water pump on the van broke and we
had to be towed into the nearest town to get replacement parts.
This put a 30 hour delay into our trip, but considering that the
project took 10 years, this isn't that bad in the grand scheme
of things. |
| 4/12/93
- |
Picked
up Fuselage Kit at SkyStar Aircraft facility in Idaho
"Started
visit at 9:30 am. (3) Seperate buildings. 90 employees, sales,
customer support, engineering (head by Frank Miller), R&D,
wood shop, welding shop, raw mat'l cutting, shipping, parts packaging,
tech/manual writing. Operation is quite organized..." |
| |
|
|
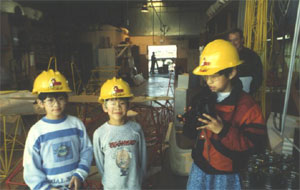
We finally
arrive at the SkyStar factory and take a grand tour of the facility.
Dad even went flying in the 582 Mk IV.
The plant
was an impressive place with a lot of good facilities. It was
my and my brother's first tour of an actual small airplane construction
facility. Get a load of how young all of us were back then.
|
|
 |
| |
 |
|
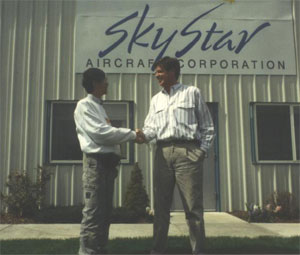
Here
is Dad sealing the deal which would start the 10 year
construction project. He's shaking hands with the president
of SkyStar, Phil Reed. The funny thing is the that Phil
Reed is actually from Mercer Island as well. My little
brother actually had classes with his son. |
| |
|
|
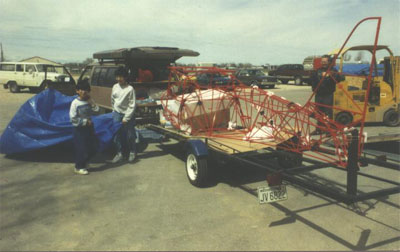
After
chatting with everybody, we had to load up the frame for
the long trip back home. You can get an idea for the size
of the entire plane from this photo. The frame comes prewelded
and powder coated. |
|
 |
| 4/25/93
- |
Installed
control stick and seat
|
| |
|
|
"Temporarily
pinned all ctl. aileron and flaps together. All operating
smoothly except flap bolt is hitting the frame"
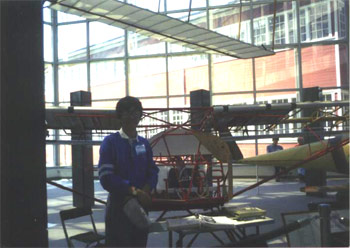
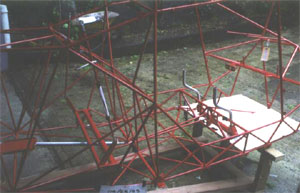
Here
a right side view of the fuselage with the control sticks
and seat installed.
|
|
 |
| |
|
|
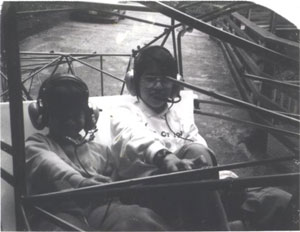
Its
starting to look like a plane. Here's me and Tim sitting
in the cockpit and playing with the control sticks. Its
fun to make plane noises and pretend you're flying, when
you're only 13, you can fool yourself into believing anything. |
| 6/29/93
- |
Pick
up Wing Kit
"At
SkyStar, met up with Phil Reed, Morris and Harry w/ Chris
Jon, Tim and Mom's help, wrapped parts up w/ foam protective
wrapper. Slided long pieces into motor home thru rear
bathroom window." |
| |
|
|
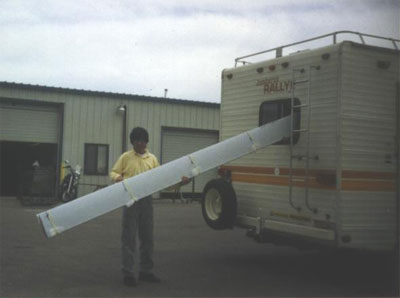
Here's
another trip to the Skystar plant to pick up the next
kit. I'm starting to see why they call it a Kitfox.
Each kit by itself isn't very expensive, but you've
got to buy a couple of them. Here's Dad sliding one
of the flaperons (aileron + flap) through the bathroom
window of the motorhome.
|
|
 |
| |
This
time, we took our old motor home down to plant. We kind
of made a vacation out of the trip and stopped to visit
Yellowstone park on the way home.
The
wing kit consists of the flaperons, wing ribs, wing spars,
and pretty much every thing you need to build the wings
themselves minus the covering.
|
|
| 10/1/93
- |
Aladize
main wing spars |
| |
|
|
We needed
to aladize the main wing spars. This is basically a process
which prevents the aluminum from reacting with the oxygen in
the air and forming an oxide on the wing spar.
|
|
 |
| |
| 10/31/93
- |
Finish
Wing Contruction
|
| |
|
|
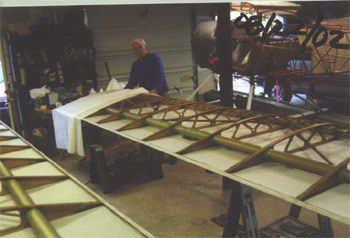
"Finished
setup and drill and cleco left wing together. First trail flaperon.
It worked good!!"
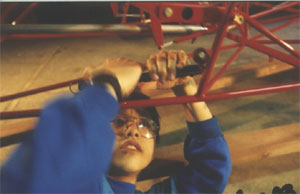
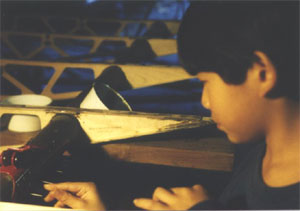
Here's Gid
working on the wing replacing the clecos with rivets to mount
the bracket which holds the wing struts.
|
|
 |
| |
|
|
Here's
me helping out as well on the fuselage frame. |
| |
|
|
Its
starting to really look like a plane now!
Jon
has to hold up one side of the plane with his shoulder to keep
it from tipping over like a cow.
|
|
 |
| 1/16/94
- |
Mount
wheels and landing gear
"With
Jon's help, filled hydraulic lines with jack petroleum base hydraulic
fluid using syringe and tubing from the bottom up starting from
the left side then from the right side. Took about 40 cc or so.
Tried it on the slope driveway. Worked pretty good. Now it needs
control springs and chain to steer the tail wheel." |
| |
|
|
|
|
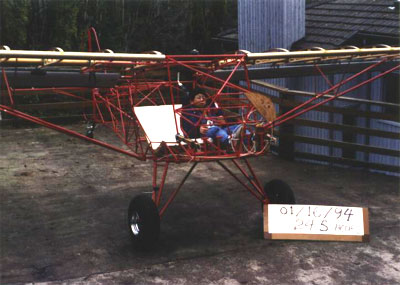
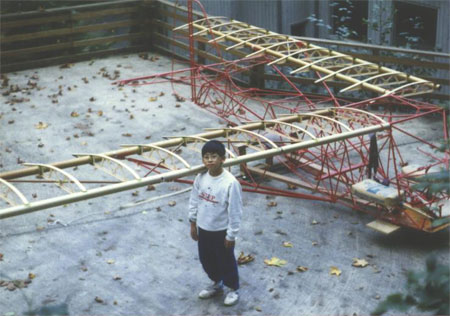
Here the
plane about 250 hours into the project. Both wings are mounted
and the landing gear is on. The brakes even work now as well.
Also performed
some preliminary weight and balance calcs. with the wings folded.
|
| 6/15/94
- |
Pick
up firewall forward kit |
| |
|
|
This time,
we didn't go down to Idaho and pick up the next kit directly
from SkyStar. Instead, he had it shipped up.
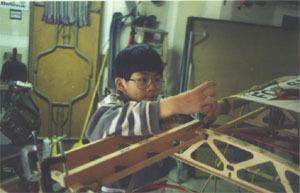
Here's Jon
working mounting the bracket which is used to align the false
ribs on the wing. He looks pretty intent on his task. I hope
he knows what he's doing.
|
|
 |
| |
| 6/??/94
- |
Exhibit
plane at EAA show at Museum of Flight |
| |
|
|
|
|
Here's
Dad with his exhibit of the Kitfox. There were a lot of other
partially finished homebuilt planes on exhibit that day. |
| |
| |
|
|
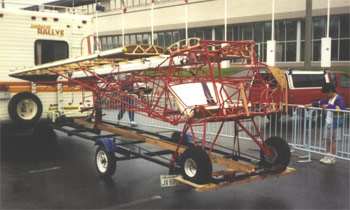
Here's
the plane with both wings and moving control surfaces. We loaded
it onto the trailer and towed it with the motor home down to
the Museum of Flight for the show.
|
|
|
5
Year Break to Build House
| 6/??/00
- |
Continue
construction after completing house
"Started
construction again after finishing the house." |
| 5/20/01
- |
Mount
float assembly to plane
"Put
in all bolts to attach float assembly to airplane." |
| |
|
|
|
|
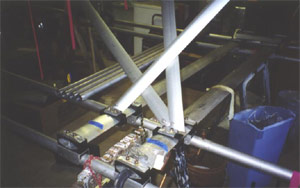
Here's
some of the early work on the float struts that Dad built to mount
to floats to the plane. With the floats on, we could take it down
to the water and see how stable it is with floats attached. |
| |
| 8/27/01
- |
Engine
bracket mounted and tested |
| |
|
|
Here's the
engine bracket mounted to the plane as it will be in flight.
The weights are used to simulate the weight of the actual engine
to see how the plane sits with the engine in.
|
|
 |
| |
| 8/28/01
- |
Test
assembled frame on water
"Got
it on the water. Able to unfolt and setup wing and pinned w/ one
person by myself.." |
| |
|
|
|
|
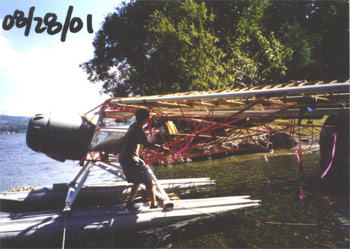
And
the plane floats! Here we are at the Mercer Island boat launch.
Dad was able to put the plane in the water and unfold the wings
by himself. The plane seemed to work fine and was stable in the
waves. |
| 8/22/02
- |
Covering
wings
"Cut
leading edge to scallop shape using a template. Go over the whole
thing using 225 F iron. Heat shrink bottom wings using 250 F for
both wings." |
| |
|
|
Here's our
neighbor, Jay, coming over to help with the covering of the
wings. He's helping with the application of the poly-tac to
the ribs. This is the material that makes the fabric stick to
the ribs.
|
|
 |
| |
| 8/23/02
- |
Stitching
the wing coverings
"Jon,
Jaye, and Judy helped to apply poly-tac to finish the other top
wing." |
| |
|
|
|
|
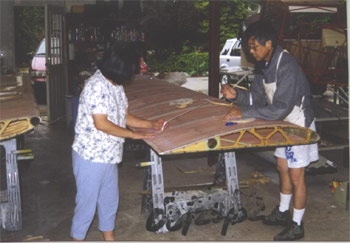
The fabric
covering of the wings need to be stiched and laced to the ribs.
This is a very long and tedious task, so Mom is helping out
as well.
|
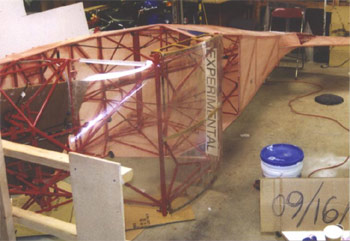
| 9/16/02
- |
Finish
taping fuselage
"Picked
up all taping on fuselage, 3 inspection rings, three round drains
and 1 seaplane drain on the vertical stab." |
| |
|
|
Here's the
fuselage on its side so that the fabric and taping could be
completed.
|
|
 |
| |
| 11/8/02
- |
Painting
empannage
"Painted
rudder, fuselage, horizontal stab, and vertical fin and elevator." |
| |
|
|
|
|
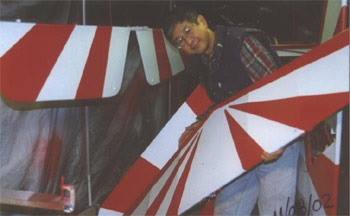
Dad
wanted to have a sunburst paint job. He spent a lot of time getting
the paint scheme just right. It looks really good on the finished
product. Here's just the rear control surfaces painted. |
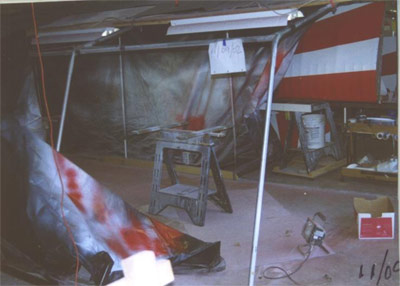
| 11/9/02
- |
More
painting
"Painted
all hard surfaces w/ red enamel, wing tips (2), (4) flaperon hinges,
inspection covers (6). Took in paint booth, re-hung florecent
lights and stored all tubings and plastic sheets in storage shed." |
| |
|
|
The painting
is a very nasty process. In order to contain all the fumes and
overspray, Dad built a paint booth in the garage. This was thermally
regulated and isolated from the outside. This kept all the paint
spray inside and Mom happy.
|
|
 |
| |
|
|
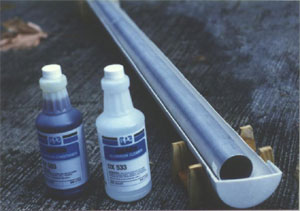
|
|
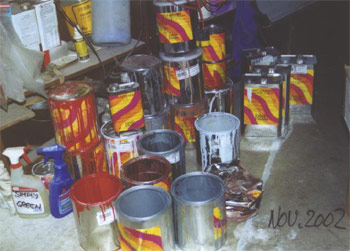
Here
all the used cans of paint and other chemicals required to do
the paint job. |
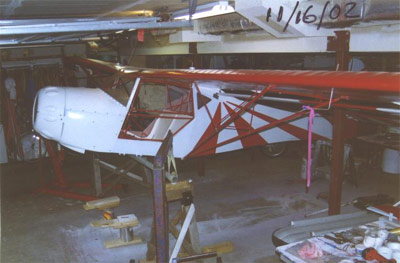
| 11/16/02
- |
Finish
painting and start to install floats
"Btrought
assembled float to under plane. Using 2 9 foot long steel pipe,
raised palne to 48" or so high on front fitting." |
| |
|
|
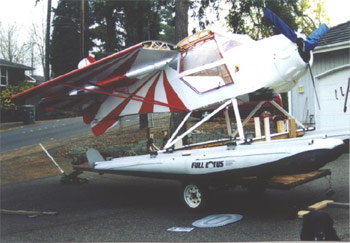
Doesn't
the paint job look nice? Now that its all painted and reassembled,
the floats need to be mounted back on. We used some steel pipes
at the cg of the plane and two engine hoists to pick it up.
|
|
 |
| |
|
|
|
|
Here's
the plane all covered, painted, and assembled on the trailer.
Its almost ready to fly except for... |
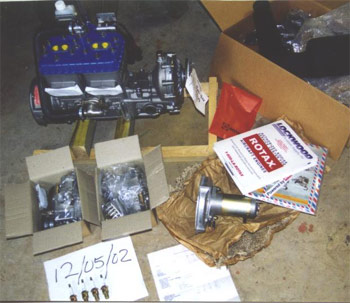
| 12/5/02
- |
Engine
kit arrives
"Picked
up engine from Overnite Transportation." |
| |
|
|
The last
kit before the plane is airworthy. The engine is a 2 cylinder,
4-stroke, 65 Hp Rotax engine.
|
|
 |
| |
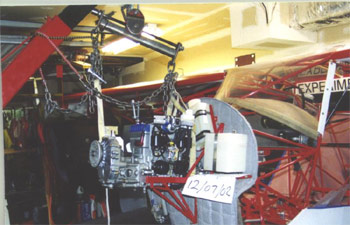
| 12/6/02
- |
Hoist
engine onto engine mount
"Hoisted
engine into place. Bolted on prop." |
| |
|
|
|
|
Here's
the engine installed on the engine mount. There was a lot more
work to connect it to the fuel tanks and prepare it for starting
up for the first time. |
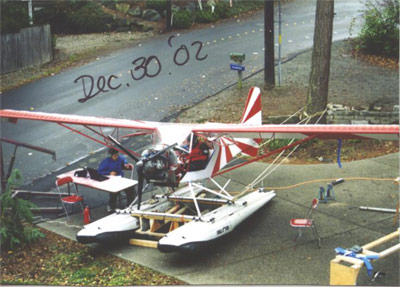
| 12/30/02
- |
Engine
break-in
"Engine
break in all done in a little over an hour. All boys helped. Chris
w/ computer as stop watch. Monitor temp on data acquisition ssytem.
Jon shot video and monitor engine condition. Tim as fire watch
and spotted loose air bleed clamp to fuel pump." |
| |
|
|
Over
Christmas break, we broke in the engine. Its a pretty long process
where you run the engine at different RPMs for different amounts
of time. We had everybody outside working on it. We had to tie
the plane to the tree so that it wouldn't fly away on the higher
RPM spots. |
|
 |
|
|
|
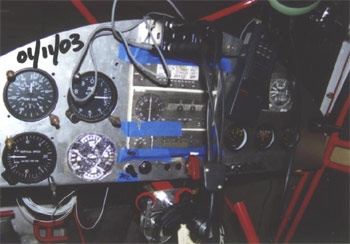
| 2/1/03
- |
Complete
instrument panel
"G-meter
and compass arrived. Rotate housing for compass to make it mount
on the ceiling." |
| |
|
|
|
|
The
last thing to do was to instrument the plane. Dad built the instrument
panel from scratch and custom installed all the instruments. |
| 2/24/03
- |
Obtain
Airworthiness Certificate
"Charlie
showed up and gone thru w/ inspection and paperwork. Got special
airwirthiness certification and operating limitation. Ready to
fly. Finally." |
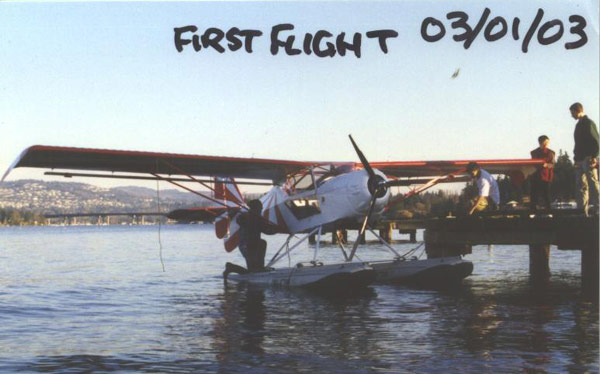
| 3/1/03
- |
FIRST
FLIGHT!!!
"1st
flight at 4:00pm or so. 3 flights to 1800 ft or so over Lake of
Washington w/ Judy, Chris, Jon and Phil. Engine running good,
everything in the greed. Flown at 60-75 mph. Landing at 45-50
w/ some power upon flare. Airplane was rock steady. Did shallow
5-10 degree bank turn. Right hand traffic wind from NW about 3
mph. Did a few 10-15 feet above water short hops." |
|
|