The hydraulic lines in a hydraulic braking system may fail at one
point or another. Due to the high pressure inside these lines, it is
not possible to easily repair a broken line using simple techniques and
often, the entire line must be completely replaced. This document
covers replacing a hydraulic brake line. The sample brake used is
a Magura HS-22.
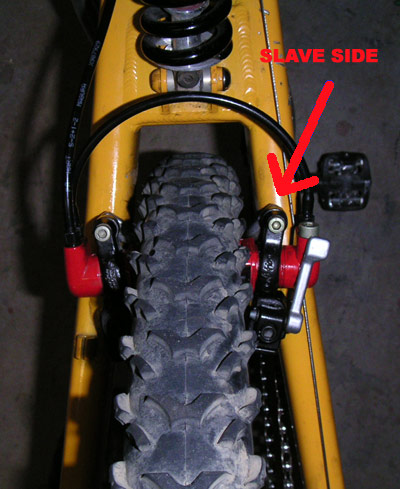
Identify the slave and the master side of the brake. The slave is the
side where there is only one hydraulic line going into it (see Figure 1)
Figure 1: Rear view of bike showing slave brake
Remove the broken hydraulic line. These lines are attached to the nipples
very well. The nipple is actually barbed so that it won't slide off. The
easiest way to do this is to cut the hydraulic line at the nipple so that
it splits. You can then remove the line (be sure to be wearing safety glasses).
Cut a new length of new hydraulic line. Be sure to use a razor blade on both
sides and cut perpendicular to the length of line (to create a clean right
angle at the ends).
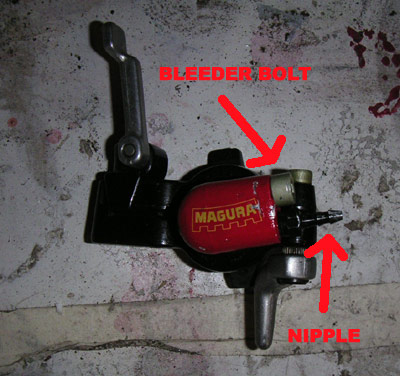
Remove the slave side brake set. Remember that this is the side with the bleeding
bolt as shown below in Figure 2.
Figure 2: Slave brake showing nipple and bleeder bolt
Remove the nipple from both the slave brake and the master brake (still on the frame) using metric wrench.
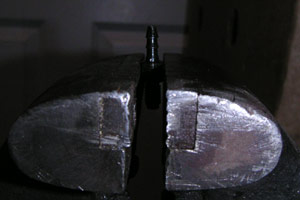
Secure nipple in vise grip with barbs facing up. DO NOT GRIP NIPPLE BY THREADS!!!
Spray nipple barbs and inside of hydraulic tube with WD-40.
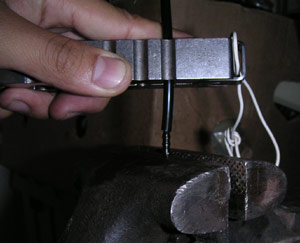
Using wire gripper, press hydraulic tube onto nipple barbs. This will take a lot of work,
be careful to only press down straight as shown below in Figure 3 (If you press at an angle,
the hydralic line will bend). Be sure to wear gloves and goggles as it may slip.
Nipple in vise
Pressing line into nipple
Figure 3: Pressing hydraulic line onto nipple
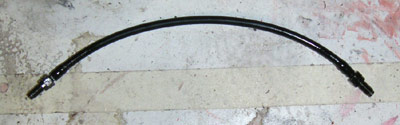
Repeat for second nipple. Finished hydraulic line should look like Figure 4.
Figure 4: Hydraulic line with nipples
Screw line back into master side of brake.
Screw the slave brake (still free from frame) onto nipple. Make sure that
you spin the slave brake around the nipple (the nipple should not be spinning).
