CSCI Homework Assignment 2 - The Robot
Due Wed Sep 12 at beginning of class
Introduction
For this assignment, you will be creating another simple Robot class in Java. This is a very primitive Robot. The Robot has only a few capabilities: it can be turned on and off, it can move forward, it can turn to the right, it can draw itself on the screen, and it can print out information about itself. A complete specification of the Robot class can be found at the bottom of the page.
Note that these Robots are seen from the top down!
The Assignment
You'll be making this Robot from scratch. But don't panic: I'll walk you through some of steps. Jut remember to take it slowly, one step at a time. Test your code frequently, after each step. It will make errors easier to find.
Ask many questions; I'm happy to help you out!
- Start by downloading a copy of Homework2.zip. This project includes the Circle, Square, and Triangle objects you're familiar with, so that you can use them to make your robot. Your robot will be made of Shapes! Note that this is not the same project as previously (I've modified it slightly to make it easier to use). Do not make any changes to the Circle, Square, or Triangle classes! Only to your Robot class!
- First, make a new
Robotclass by clicking the "New Class" button. There, now you're started! You can double-click this class to see its source code. You can also make new Robots by using the BlueJ interface. - Your robot will need to maintain some information about its state by using fields--for example, the robot may want to remember a name (e.g., "Robbie", "R2D2"). Make sure you give the field a meaningful name so the rest of your code is easier to read.
- Now modify the constructor so that it takes a single parameter: the robot's name. This parameter should be a string. Remember, this parameter will need to be stored in the object's state field!
- Add a
toString()method so that we can print out the Robot's status. Remember, this method should return a String representation of the robot--for example "Robbie the Robot." - Remember to test each method as you create it using either the Code Pad or the BlueJ Interactive Window.
-
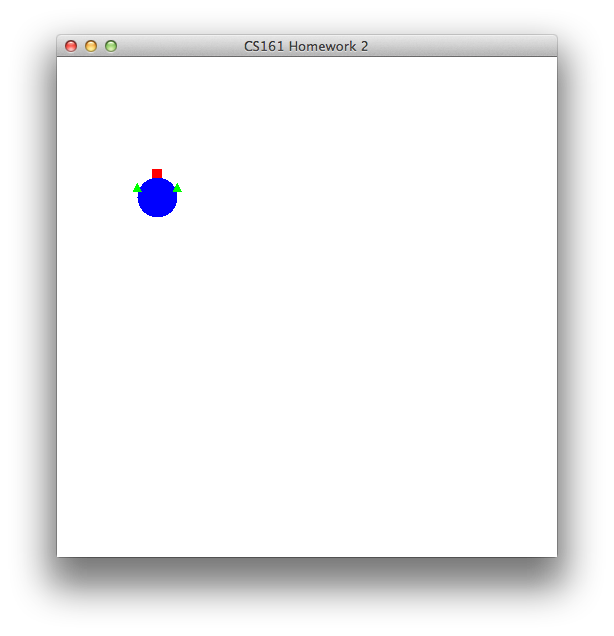
Now it's probably a good idea to define what your robot looks like, using the the Circle, Square, and Triangle objects. For example, we might give it a body that is a Square, and a head that is a Circle. Since we don't want our robot to lose its head, we'll want to make these body parts into fields. You are free to make your robot as awesome looking as you want, but more complicated robots may be more difficult to move and turn later. I suggest starting with just a body and a head. Also, make sure you have time to finish the rest of the assignment!
Hint: You can make a new Circle, Square or Triangle in your robot by using thenewkeyword. For example, I might make the body of my robot a Square by usingbody = new Square();in the constructor (be sure to have declared the body variable with the other attributes/fields!) - Once you've defined what your Robot will look like, let's give the robot a method to draw itself on the screen. Since the Shape objects that make up our robot are shown on the screen using a method called
makeVisible(), let's also give our Robot amakeVisible()method. This method should tell all of the body parts to make themselves visible. Test that calling this method does draw your robot on the screen (and that your robot looks the way you want it to!) - The next thing we'll want to do is make sure our robot can be turned on. The Robot object will need to keep track in the state of whether it is on or off. And we'll want to make methods that turn the robot on and off (see the documentation below for those methods' signatures). Remember to test that these methods work (and do change the robot's state), and that nothing else broke. You also will want to change the
toString()method so that the robot's state is included when it prints out the status. - Now that we can turn our robot on, we can go ahead and create a method to move the robot forward by a certain distance (again, see the documentation for the method signatures). We can move the robot by moving its component parts--e.g., moving the body, the head, etc. Remember that we should only move the robot if the robot is turned on! Test to make sure this works.
- Next, let's write the method that will turn the robot 90degrees to the right. Again, this should move the component body parts. You may need to be careful about your robot design so that it still looks okay when turned around! (Consider what functionality is missing from the Shape objects that would help us out). Test that it works correctly no matter how many right turns you make.
- So it seems like we're done, right? We've included a RobotTester class to help test your completed Robot. Does everything seem to work? Feel free to add more tests to the class if you're not sure.
-
It's possible that your
moveForward()method doesn't work when the robot is turned--because forward is no longer "up" on the screen. This means your robot is going to need to keep track of what direction it is facing. Add this capability to your robot if you haven't already. Once you've done that, you'll need to modify themoveForward()method to consider what direction the robot is facing when determining how to change the component Shapes. Hint: One simple way to do this is to use a variable to the state that keeps track of current direction, and then use a conditional statement to choose which direction to move whenmoveForward()is called. - Make sure to test everything thoroughly. Once you're sure it works, You can use the RobotChaos class to view many copies of your robot moving randomly! Weee!!
- Finally, make sure to include comments in your code explaining what you did!
Submitting
Submit your solution through BlueJ following the same submission directions as presented in Lab A. However make sure to select "Hwk2" instead of "LabA".
Submitter will accept the Robot.java file.
Grading
This assignment will be graded on the following criteria:
- The Robot object can be turned on and reports its state using toString()
- The Robot is able to move forward and turn to the right. The Robot visually appears to turn.
- The Robot only moves if it is on!
- The moveForward() method moves the Robot in the direction that it is facing.
- Your code is documented with comments explaining what you've done.
Class Documentation
Class Robot
java.lang.Object
  Robot
-
public class Robot
- extends java.lang.Object
This class simulates a simple robot.
| Constructor Summary | |
|---|---|
Robot(java.lang.String _name)
Constructor for objects of class Robot |
|
| Method Summary | |
|---|---|
void |
makeVisible()
Makes the robot visible on the screen |
void |
moveForward(int distance)
Moves the robot forward by the specified distance |
java.lang.String |
toString()
Returns text representation of the robot's status |
void |
turnOff()
Turns the robot off |
void |
turnOn()
Turns the robot on |
void |
turnRight()
Turns the robot 90 degrees to the right |
| Methods inherited from class java.lang.Object |
|---|
clone, equals, finalize, getClass, hashCode, notify, notifyAll, wait, wait, wait |
| Constructor Detail |
|---|
Robot
public Robot(java.lang.String _name)
- Constructor for objects of class Robot
| Method Detail |
|---|
makeVisible
public void makeVisible()
- Makes the robot visible on the screen
moveForward
public void moveForward(int distance)
- Moves the robot forward by the specified distance
toString
public java.lang.String toString()
- Returns text representation of the robot's status
- Overrides:
-
toStringin classjava.lang.Object
turnOff
public void turnOff()
- Turns the robot off
turnOn
public void turnOn()
- Turns the robot on
turnRight
public void turnRight()
- Turns the robot 90 degrees to the right