Adding In-flight
Smoke Capability to the RV-12
Inspired by David Valcik's and Steve Garrett's postings, I ordered the
following materials for my RV-12:
- The smoke generator kit from Sky Smoke, Inc: http://www.skysmoke.com/products.htm
- 20' of fuel/oil compatible tubing (US Plastics, part #54013, 1/4"
ID x 3/8" OD x 1/16" Wall Vinyl Fuel and Oil Tubing): http://www.usplastic.com
- 12V Solenoid part #2P025-1/8-1-G-S from Sizto Tech
Corp. http://www.stcvalve.com
- A red blinking 12V indicator light, Dorman part #84918 from the
local O'Reilly auto parts store
- 6 feet of low pressure automotive fuel/vent line with 1/4 inch
inside diameter and stainless steel 'band aid' clamps (also from auto
parts store)
- 2 gallons of Super Dri Smoke oil from Aerographix ( http://www.aerographix.biz/smoke_oil.htm
)
- And stuff I had in the shop already:
- a foot of 5/16 inch inside diameter automotive fuel/vent line
- a foot of .063 x 3/4 x 3/4 angle from Van's
- number 4 size aviation flare fittings with 1/8 NPT threads on
the non-flare side
- a size 4 bulkhead penetration flare fitting
- 18 ga Tefzel wire
- MateNLock aviation connectors from TerminalTown (http://www.terminaltown.com )
- 8-32 nutserts
- A foot of 1/4 OD aluminum tubing (brake line material from
Van's)
I first drilled
a hole in the firewall at the same location David Valcik put his, and
installed the aviation bulkhead fitting. Put a short piece of
flared aluminum tubing to make a transition to the 1/4 ID automotive
fuel line tubing:

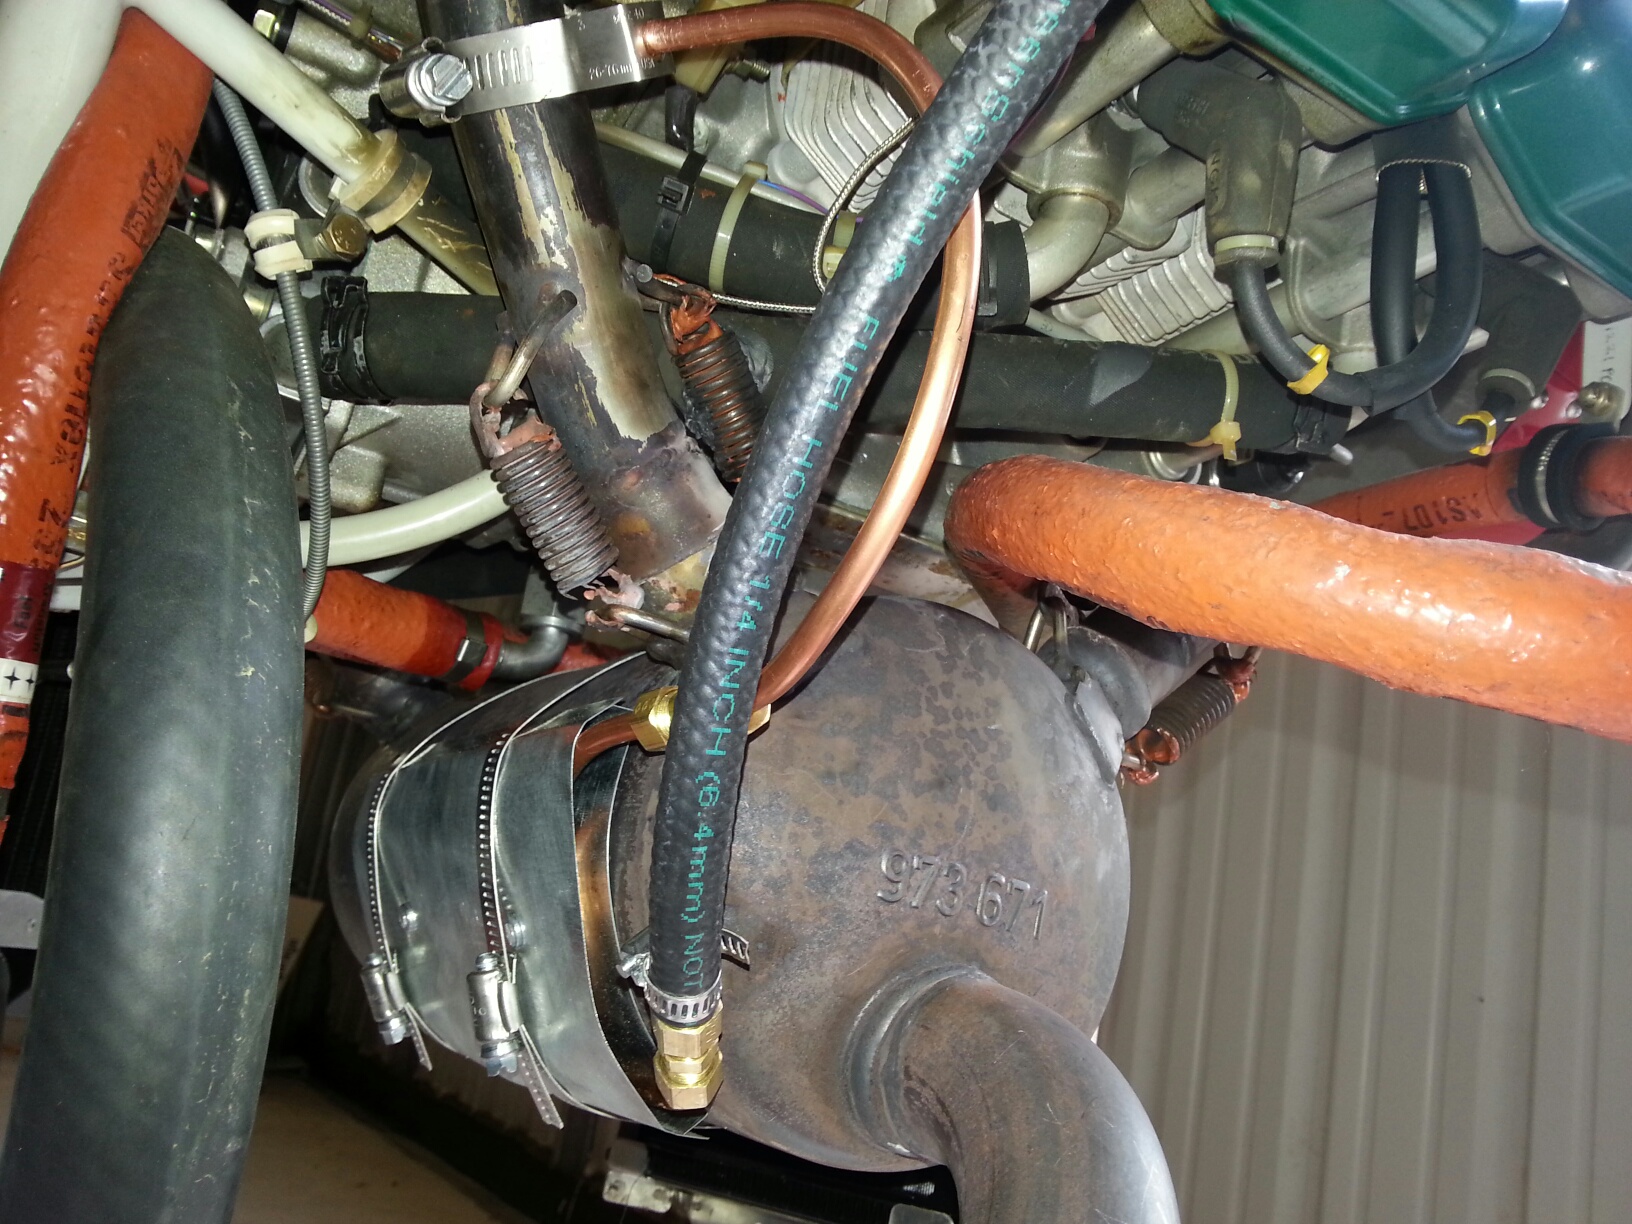
The preheat unit from SkySmoke was then clamped to the back of the
Rotax muffler, and the copper line provided by SkySmoke routed to the
right rear exhaust just below the curve. The hole needs to be
drilled 23/64ths then tapped with a 1/8 NPT tap to screw the injector
in place.
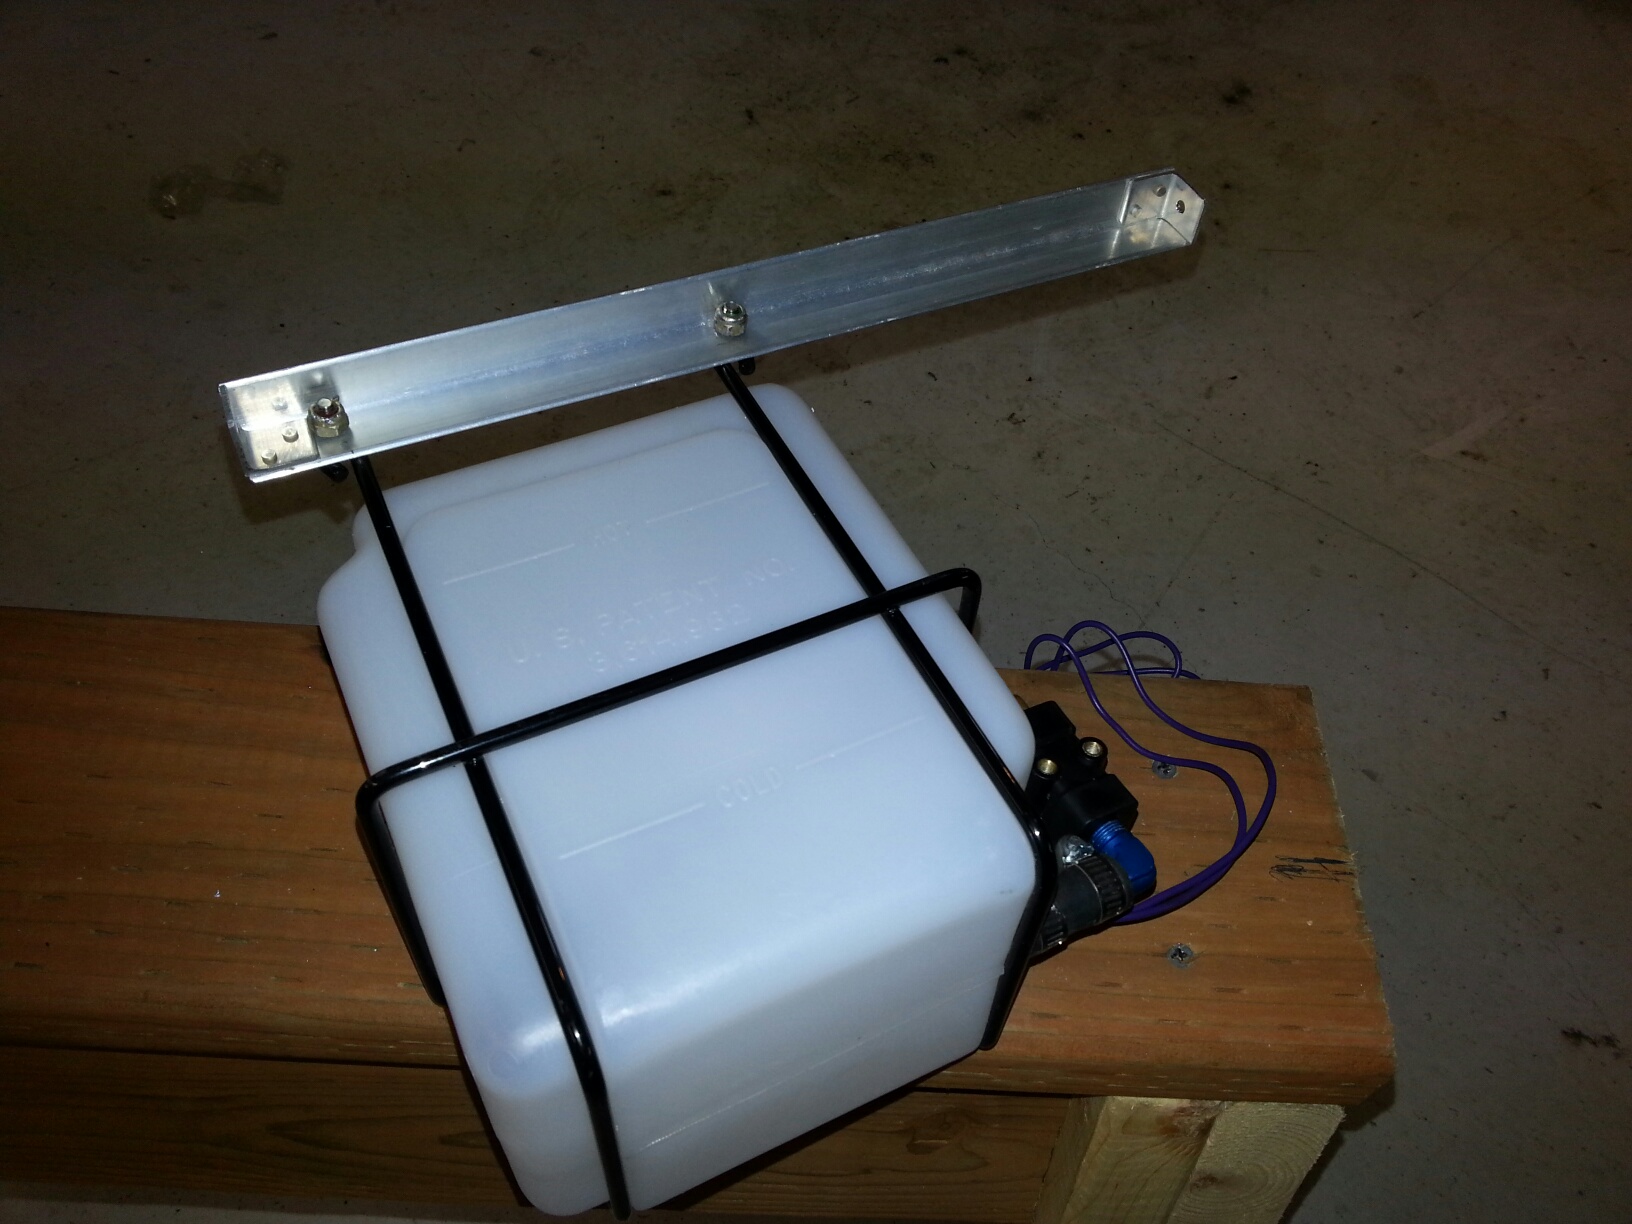
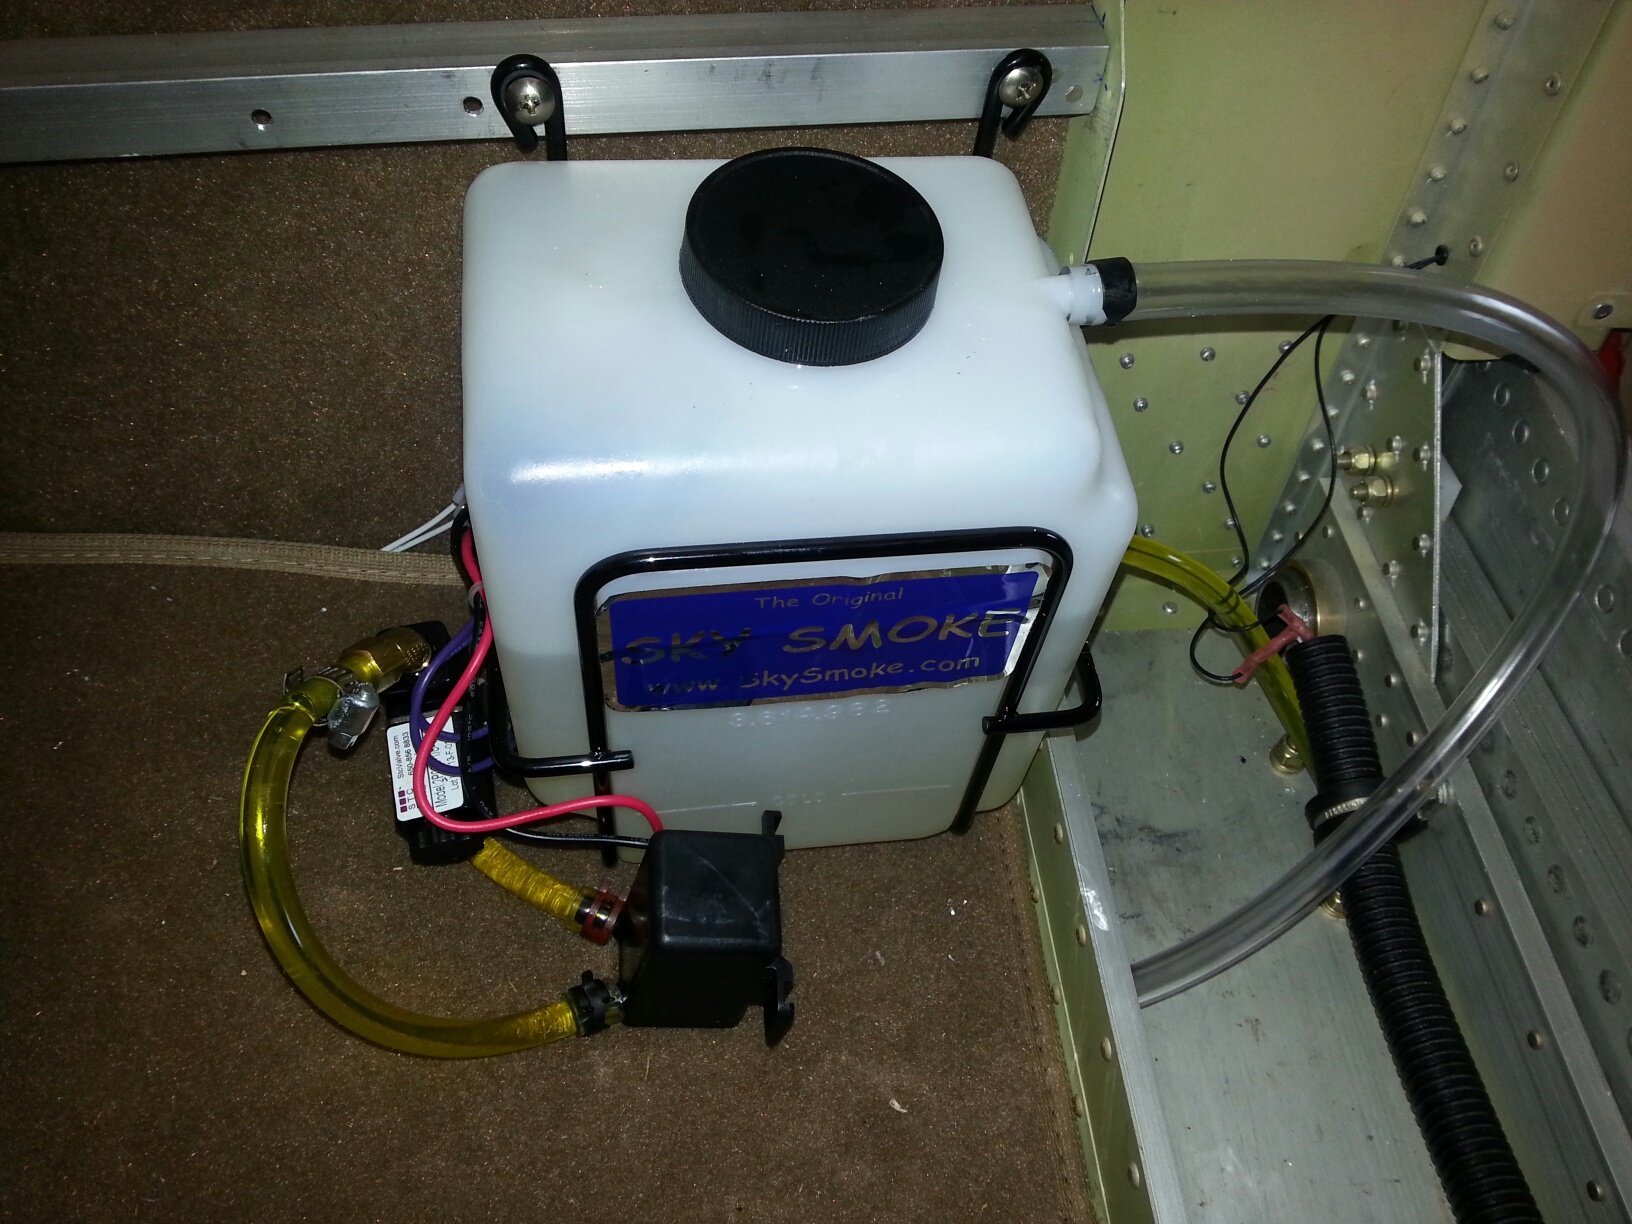
With the FWF
part done, I fabricated a bracket from 0.063 angle for the tank, that
would fit between the stiffeners on the baggage compartment wall,
behind the pilot seat. Closed the ends with more 0.063 riveted to
the main angle piece, and drilled it for the bracket supplied by
SkySmoke. In this photo you can also see the solenoid valve
(needed because the entire assembly is above the level of the injector,
to avoid siphoning), which is attached with a small piece of 5/16 ID
fuel line to the tank outlet. The solenoid valve is threaded for
1/8 NPT fittings.
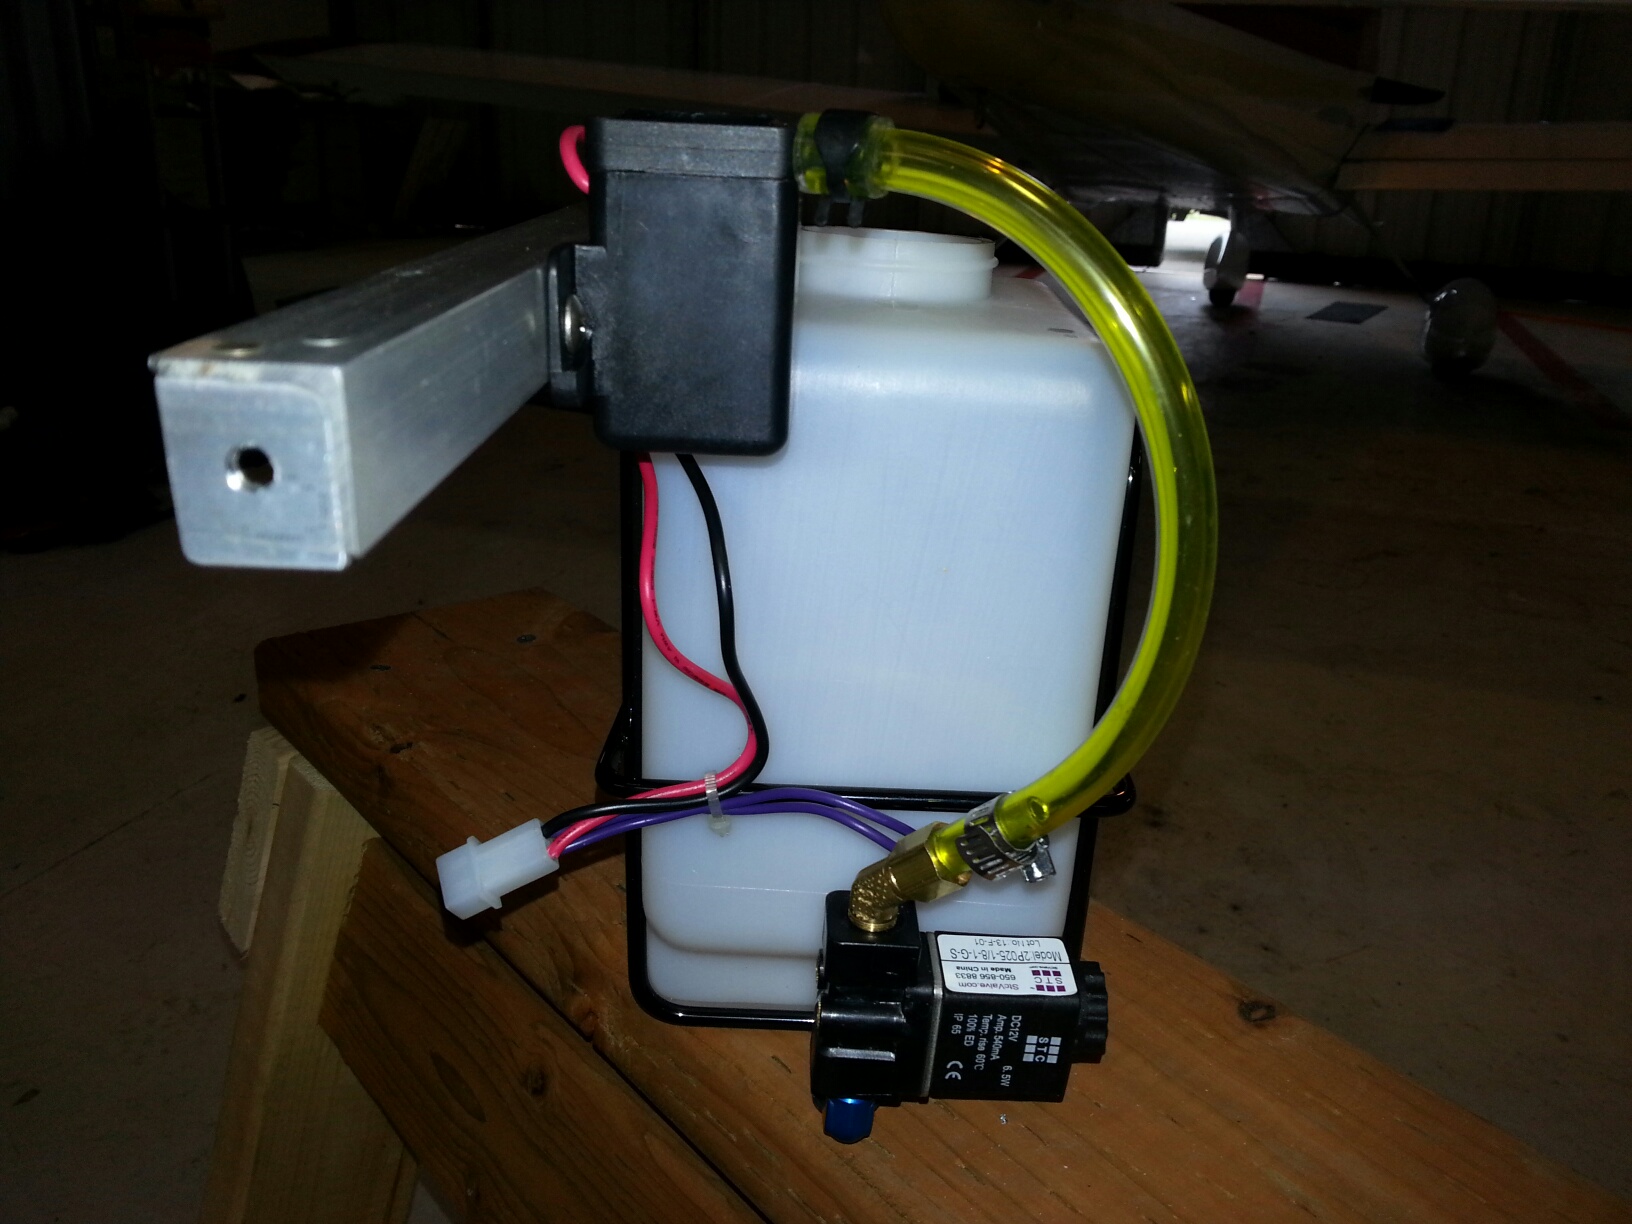
I put 8-32
nutserts on the end pieces, since there was not room for a regular
platenut. Here you see the pump mounted above the level of the
tank. This turned out not to be usable, since the pump doesn't
have enough sucking power to prime itself and pump a steady stream
without bubbles when mounted at this location. After the first
flight, I unbolted the pump and moved it down to the level of the
solenoid, where it could be gravity fed. (The amount of smoke
quadrupled as a result of this change). I terminated the wires
for both pump and solenoid in a Molex MateNLok connector, so both would
be energized at the same time. The brass angle fitting is the
same one used on the RV-12 brake cylinders, with a short flared piece
of 1/4 aluminum tubing.
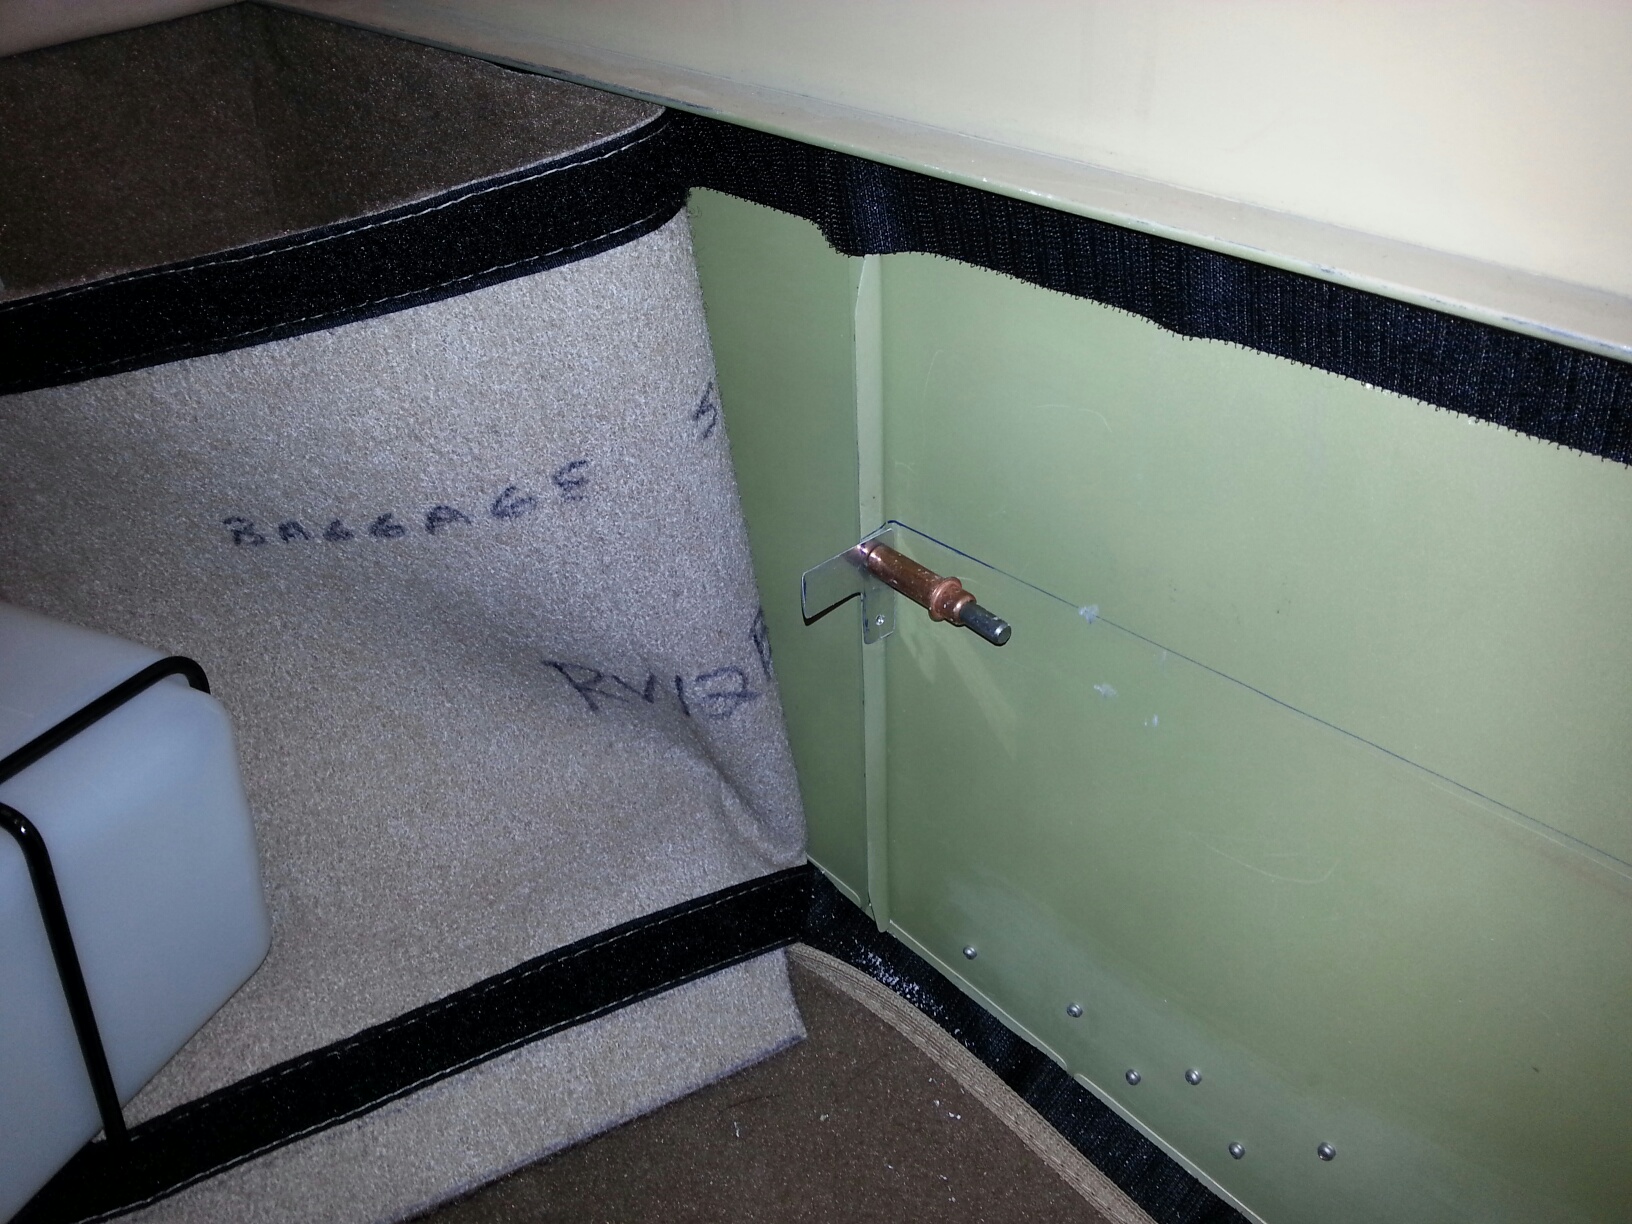
Since I have the
baggage compartment carpet kit, I wanted a clean installation with
minimal upholstery disruption. Fabricated a piece of 0.050
aluminum with a tab sticking through the carpet, and riveted it to the
wall stiffener. Forward side just required a hole in the larger
sidewall stiffener.
The current
configuration (which still needs a bit more work to fasten the pump at
the base of the tank) is shown here. Solenoid valve prevents
leakage and siphoning, and when energized the pump fills by gravity and
creates a strong fluid stream. The yellow output tubing runs on
the back side of the U channel over to the passenger/co-pilot side, and
from there underneath the armrest and behind the upholstery forward to
the bulkhead fitting.
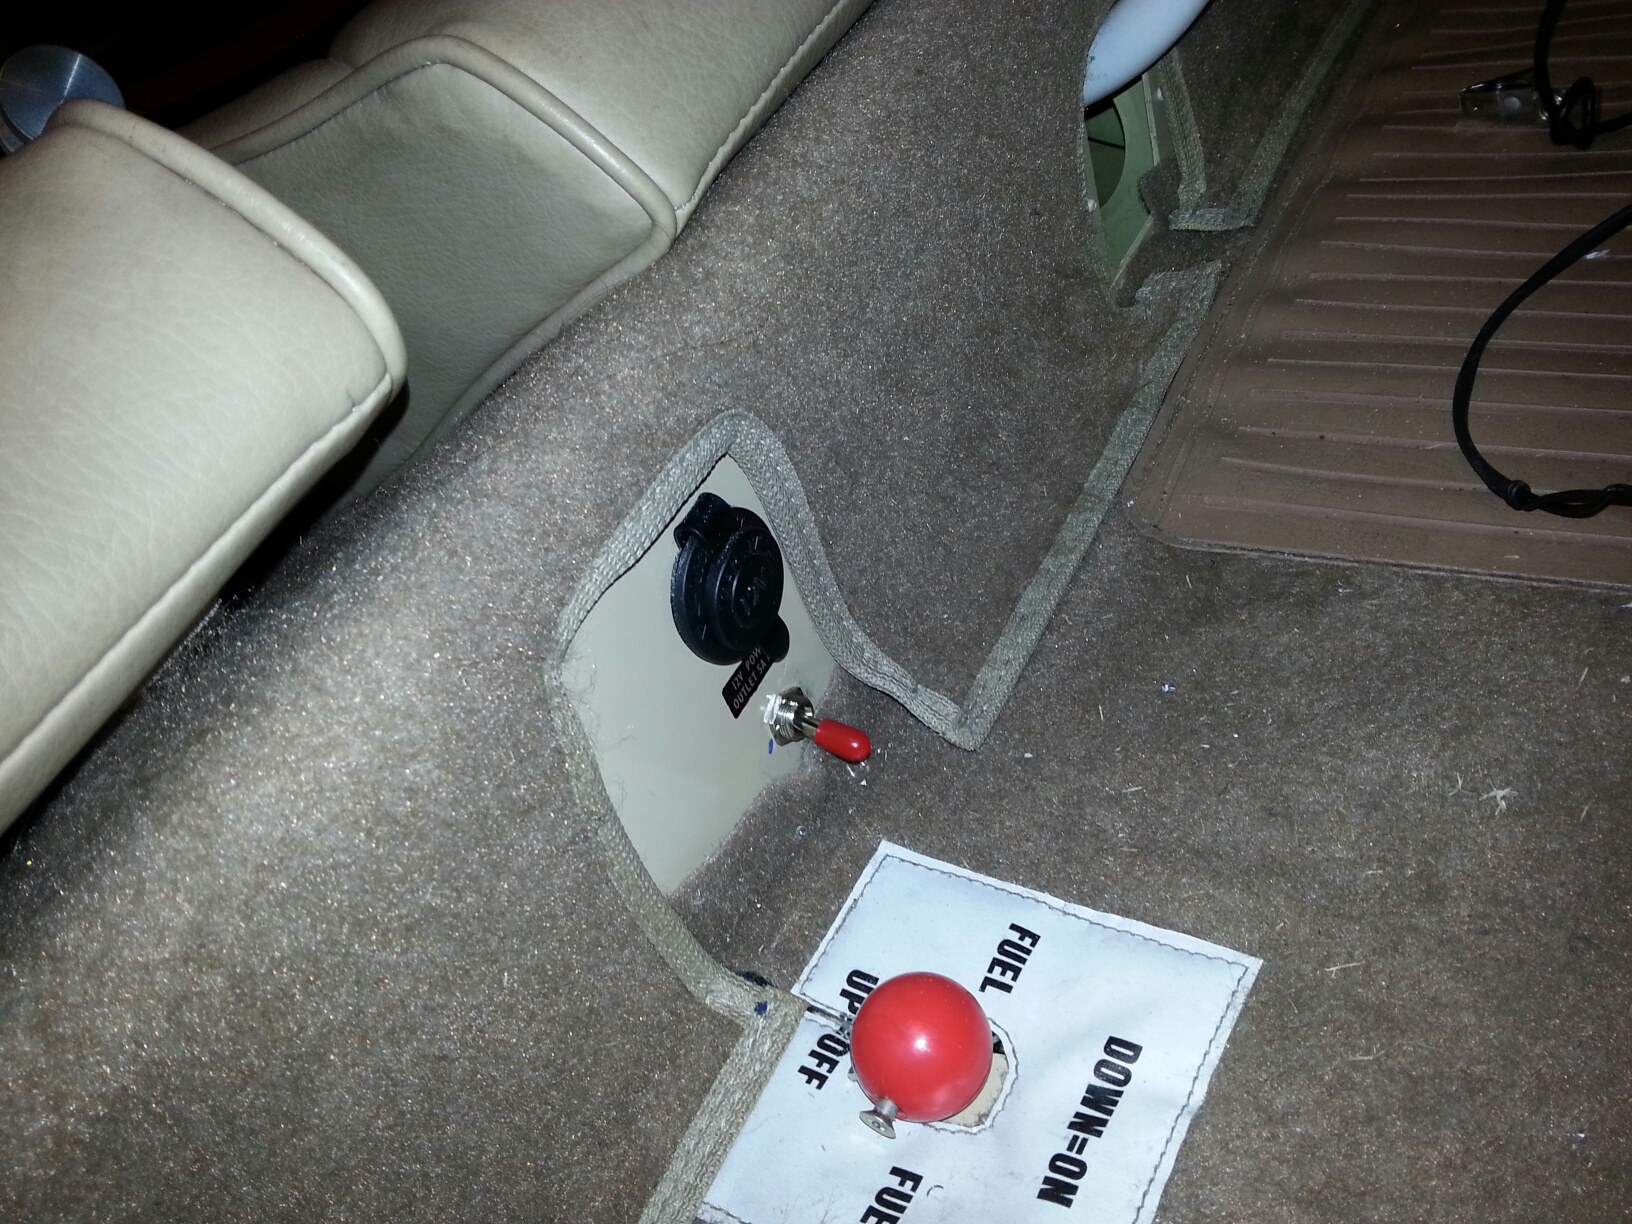
I picked up
power from the 12volt accessory outlet, and put the switch near the
floor below the power outlet to make it relatively inconspicuous, and
minimize the chance of inadvertent activation (particularly since the
12v outlet is connected to the battery and is hot all the time.)
Ran an 18ga. power wire back along the side of the tunnel, and a 22 ga
wire forward in the bundle up to the space behind the instrument panel.
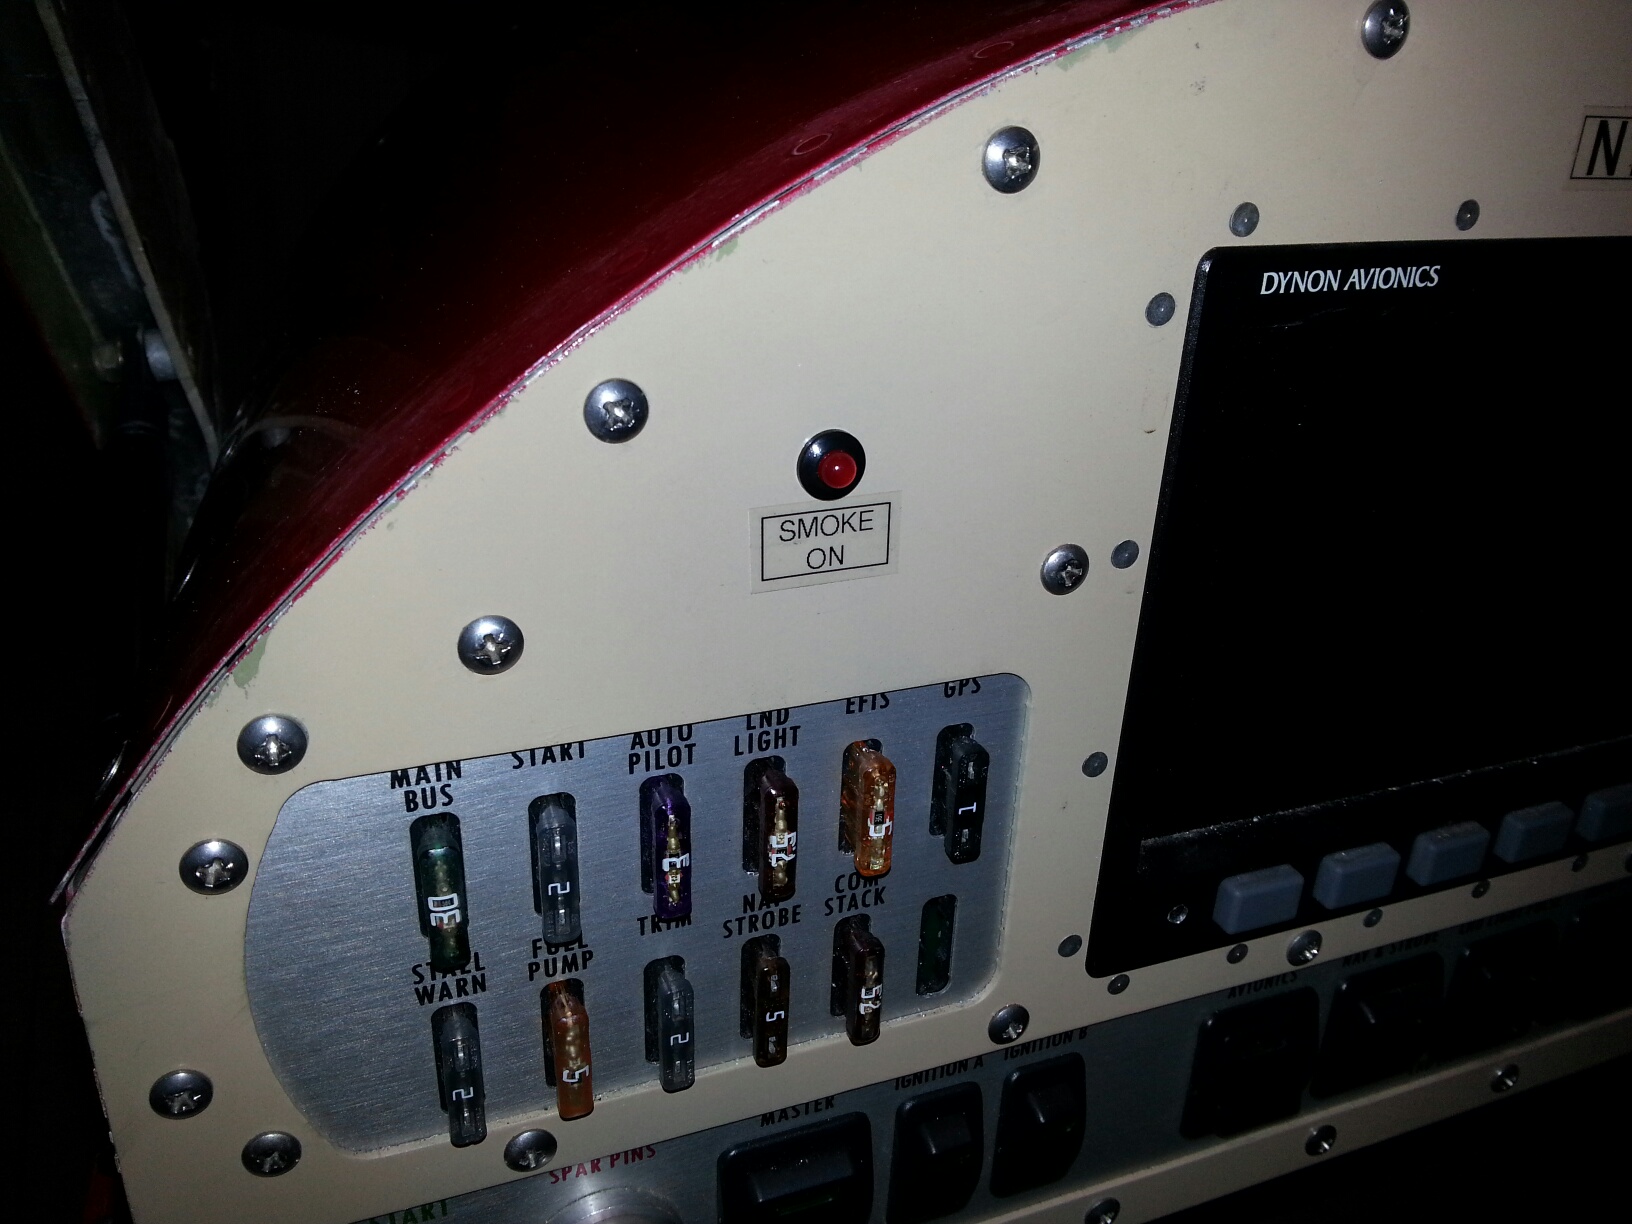
Mounted the
blinking red LED indicator above the fuse panel. Mostly for
alerting about inadvertent switch-on, since there is no doubt in the
cockpit when you are making smoke inflight! (more below on that):
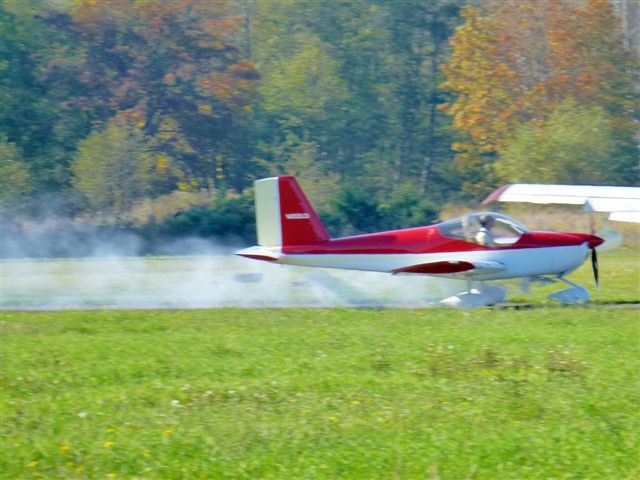
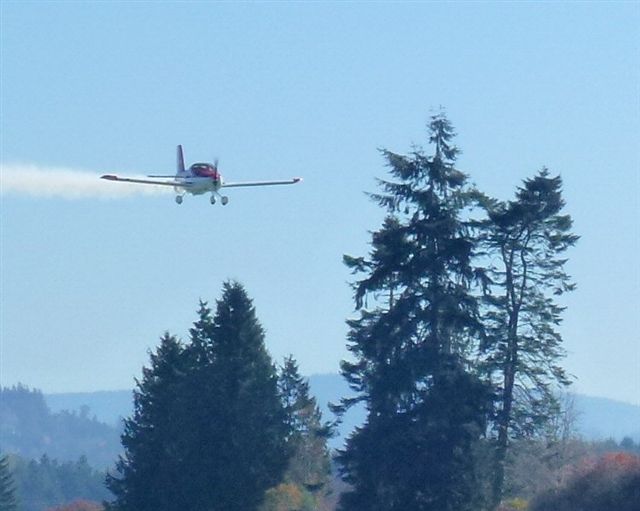
And with all in
place, headed out for ground tests, and flight tests. As noted
above, with the pump above the reservoir, smoke production was light
and spotty. With a gravity feed to the pump, very impressive
smoke production:
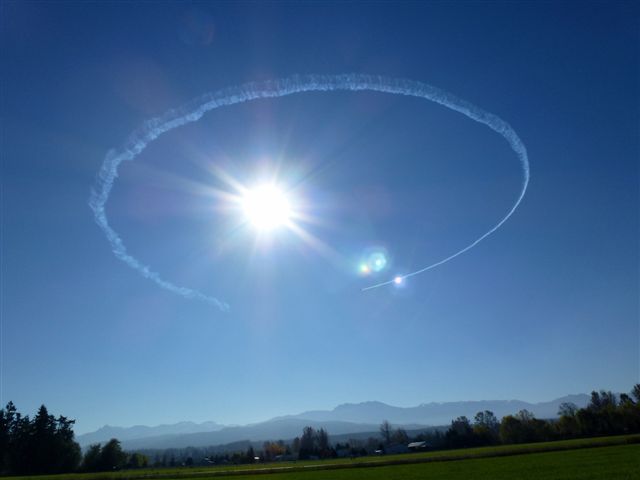
The online photo
+ movie version of the test flight is at: http://www.photoshow.com/watch/Hr6FY9Tq
Issues to sill
be resolved as of 10/25/2013:
The smoke
production is so luxurious that some of it comes back into the cabin
from somewhere behind the pilot seat. Definitely not coming in
either the canopy or the vents. Most likely this is the square
opening where the gear legs penetrate the fuselage. Next
improvement is sealing that opening with upper transition fairings and
some duct tape. Will update this page when I get the engineering
solution for that problem.